One of my favorite knits so far has been the Levenwick cardigan by Gudrun Johnston . I have worn it countless times, and it is my most admired knit, both in person and on Ravelry. I was asked by a friend of mine to make another one, and I happily obliged. And what better time then now, when there are still 2 months left before the deadline for the Luvinthemommyhood Summer Sweater KAL runs out.
I thought it would be a quick project, since I have already knit it once. I was making quick progress on the cardigan until I got to the yoke, which for increases uses the "invisible purl increase". I remember stumbling across this part the first time around as well, so I hopefully turned to my notes. Alas, I did not make any on this particular subject. So I turned to Google, which surprisingly, failed me, as it had the first time around. I had no choice but ti figure it out on my own....again.
The pattern notes give the following instructions:
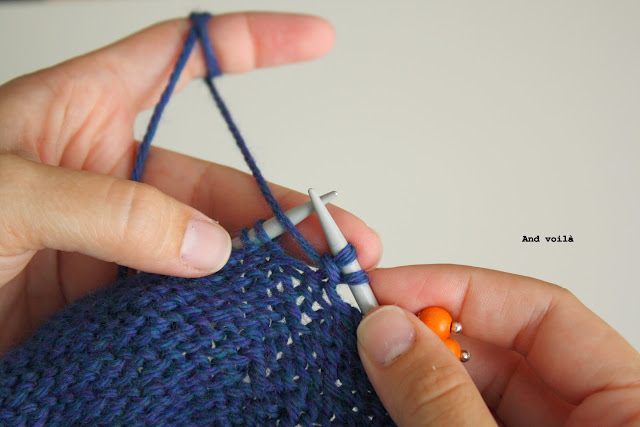
"Insert the right hand needle from the top down into the purl stitch that sits below the next stitch on the left needle. Purl this stitch and then purl the next stitch on the needle."
A decent explanation, but I am that kind of girl that needs pictures. So here's my first ever tutorial on the "invisible purl increase".
Now, I have no way of verifying that this is indeed the correct way of doing it, all I can say that this is how I have knit it. If I am incorrect, please let me know!
And at this point a "thank you" to my husband who took these photos despite some serious hay-fever this morning!


I have never knitted Levenwick!! But great tutorial when I decide that I should have my own. Love the yarn you chose!
ReplyDeleteThank you Nat, I know you were scared by Winnowing, but once you are over that shock, you should try this!
DeleteOooh that looks like a fabulous way to increase! I love how it truly is invisble AWESOME!
ReplyDeleteKudos to the hubs for the photos, he's dedicated that's for sure :)
It is, isn't it? And it looks great on the WS too! The hubs is indeed patient!
DeleteInteresting! I plan on knitting Levenwick when I'm done with the sweater I'm working on now (if there's time :P). I'll have to come back for a look. Thanks for the visual!
ReplyDeleteNo proble, you'll really like it. It also has an I-cord border that is pretty cool, and I've never had on any other poject.
DeleteGreat pictures! Thanks!
ReplyDeleteThank you SO MUCH for posting this. I'm knitting the Levenwick right now and after countless youtube knitting tutorials that looked nothing like what the instructions called for, I was getting frustrated. These are fabulous pictures. I'm so excited to keep going on this sweater. Thank you!
ReplyDeleteReally glad I could help! Levewick is a fabulous pattern, enjoy!
DeleteI have tried this so many times and I still never come up with the same result as you! What I create is still a good solution (THANK YOU), but I wish I could get it to look like yours.
ReplyDeleteTo me, it looks like you end up with what appears to be 1 purl st (1 bar across), but with 2 loops coming out of the bar (the 2 loops/sts) on the needle. In other words, 2 stitches sharing the same bar. Each of MY stitches end up with their own bar though (2 bars instead of 1) and I can't figure out what to do differently.
Is maybe the angle of the picture not showing both bars? Or am I really doing something different? I'm REALLY curious! I've even done Google searching to no avail.
Thanks and Happy New Year!
With many thanks for this, I was struggling with this increase on the Levenwick!
ReplyDeleteThank you for posting this! I'm working on a different Gudrun Johnston pattern (Kerrera) that uses the same increase and I was somewhat concerned!
ReplyDelete